Are you tired of looking at your wrinkled and loose carpet? Don’t worry, because I’ve got the perfect DIY solution for you! In this article, we’re going to delve into the world of carpet stretching, and I’ll show you step-by-step how to stretch your carpet like a pro. So, grab your tools and get ready to transform your room with a perfectly stretched carpet that will make you feel like you’re walking on clouds.
When it comes to carpet stretching, many people tend to rely on professionals to get the job done. But why spend money when you can do it yourself? With a little bit of patience and the right techniques, you can achieve professional-looking results without breaking the bank. In this guide, I’ll walk you through the entire process, from preparing your room to stretching the carpet and trimming the excess. Whether you’re a seasoned DIY enthusiast or a complete novice, I’ve got you covered. So, let’s dive in and learn how to stretch carpet DIY-style for a beautiful and flawless finish.
Stretching carpet is a simple process that can be done yourself. Here’s a step-by-step tutorial on how to stretch carpet using DIY methods:
- Start by removing all furniture from the room.
- Use a knee kicker to stretch the carpet towards the walls, starting from one corner.
- Secure the carpet by using a power stretcher to stretch it across the room.
- Trim any excess carpet using a carpet knife.
- Finally, reposition the furniture back into the room.
With these easy steps, you can stretch your carpet DIY-style and give your room a fresh and polished look.
How to Stretch Carpet DIY: A Comprehensive Guide
Stretching carpet is an essential skill for any DIY enthusiast or homeowner looking to refresh their space. Whether you’re dealing with loose or wrinkled carpet, knowing how to stretch it properly can restore its appearance and extend its lifespan. In this article, we will take you through a step-by-step process on how to stretch carpet DIY style, so you can achieve professional-looking results without breaking the bank.
Understanding the Importance of Stretching Carpet
Carpet stretching is not just about improving the aesthetics of your floor; it also plays a crucial role in maintaining a safe and comfortable environment. Over time, carpets can become loose and develop wrinkles, which not only look unsightly but can also pose a tripping hazard. By stretching your carpet, you can eliminate these issues, ensuring a smooth and secure surface for everyone in your home. Additionally, stretched carpet helps to minimize wear and tear, preventing premature damage and the need for costly replacements.
To successfully stretch your carpet, you’ll need a few tools and materials. These include a power stretcher, knee kicker, carpet knife, staple gun, and a pair of pliers. Additionally, you’ll need a utility knife, measuring tape, and a straight edge for precise cutting and measuring. Having these tools readily available before you begin will make the process much smoother and more efficient.
Step 1: Prepare the Room
Before you start stretching your carpet, it’s essential to prepare the room properly. Remove all furniture and objects from the area to ensure you have a clear workspace. Inspect the carpet for any stains or damage that may need to be addressed before stretching. Vacuum the entire floor to remove any dirt or debris that may interfere with the stretching process. Taking the time to prepare the room will make the carpet stretching process easier and more effective.
Once the room is cleared and cleaned, it’s time to assess the condition of your carpet. Look for any loose areas or wrinkles that need to be addressed. Identify the edges of the carpet and determine the direction in which it needs to be stretched. This will help you plan your stretching method and ensure a more precise and even stretch.
Step 2: Stretching Techniques
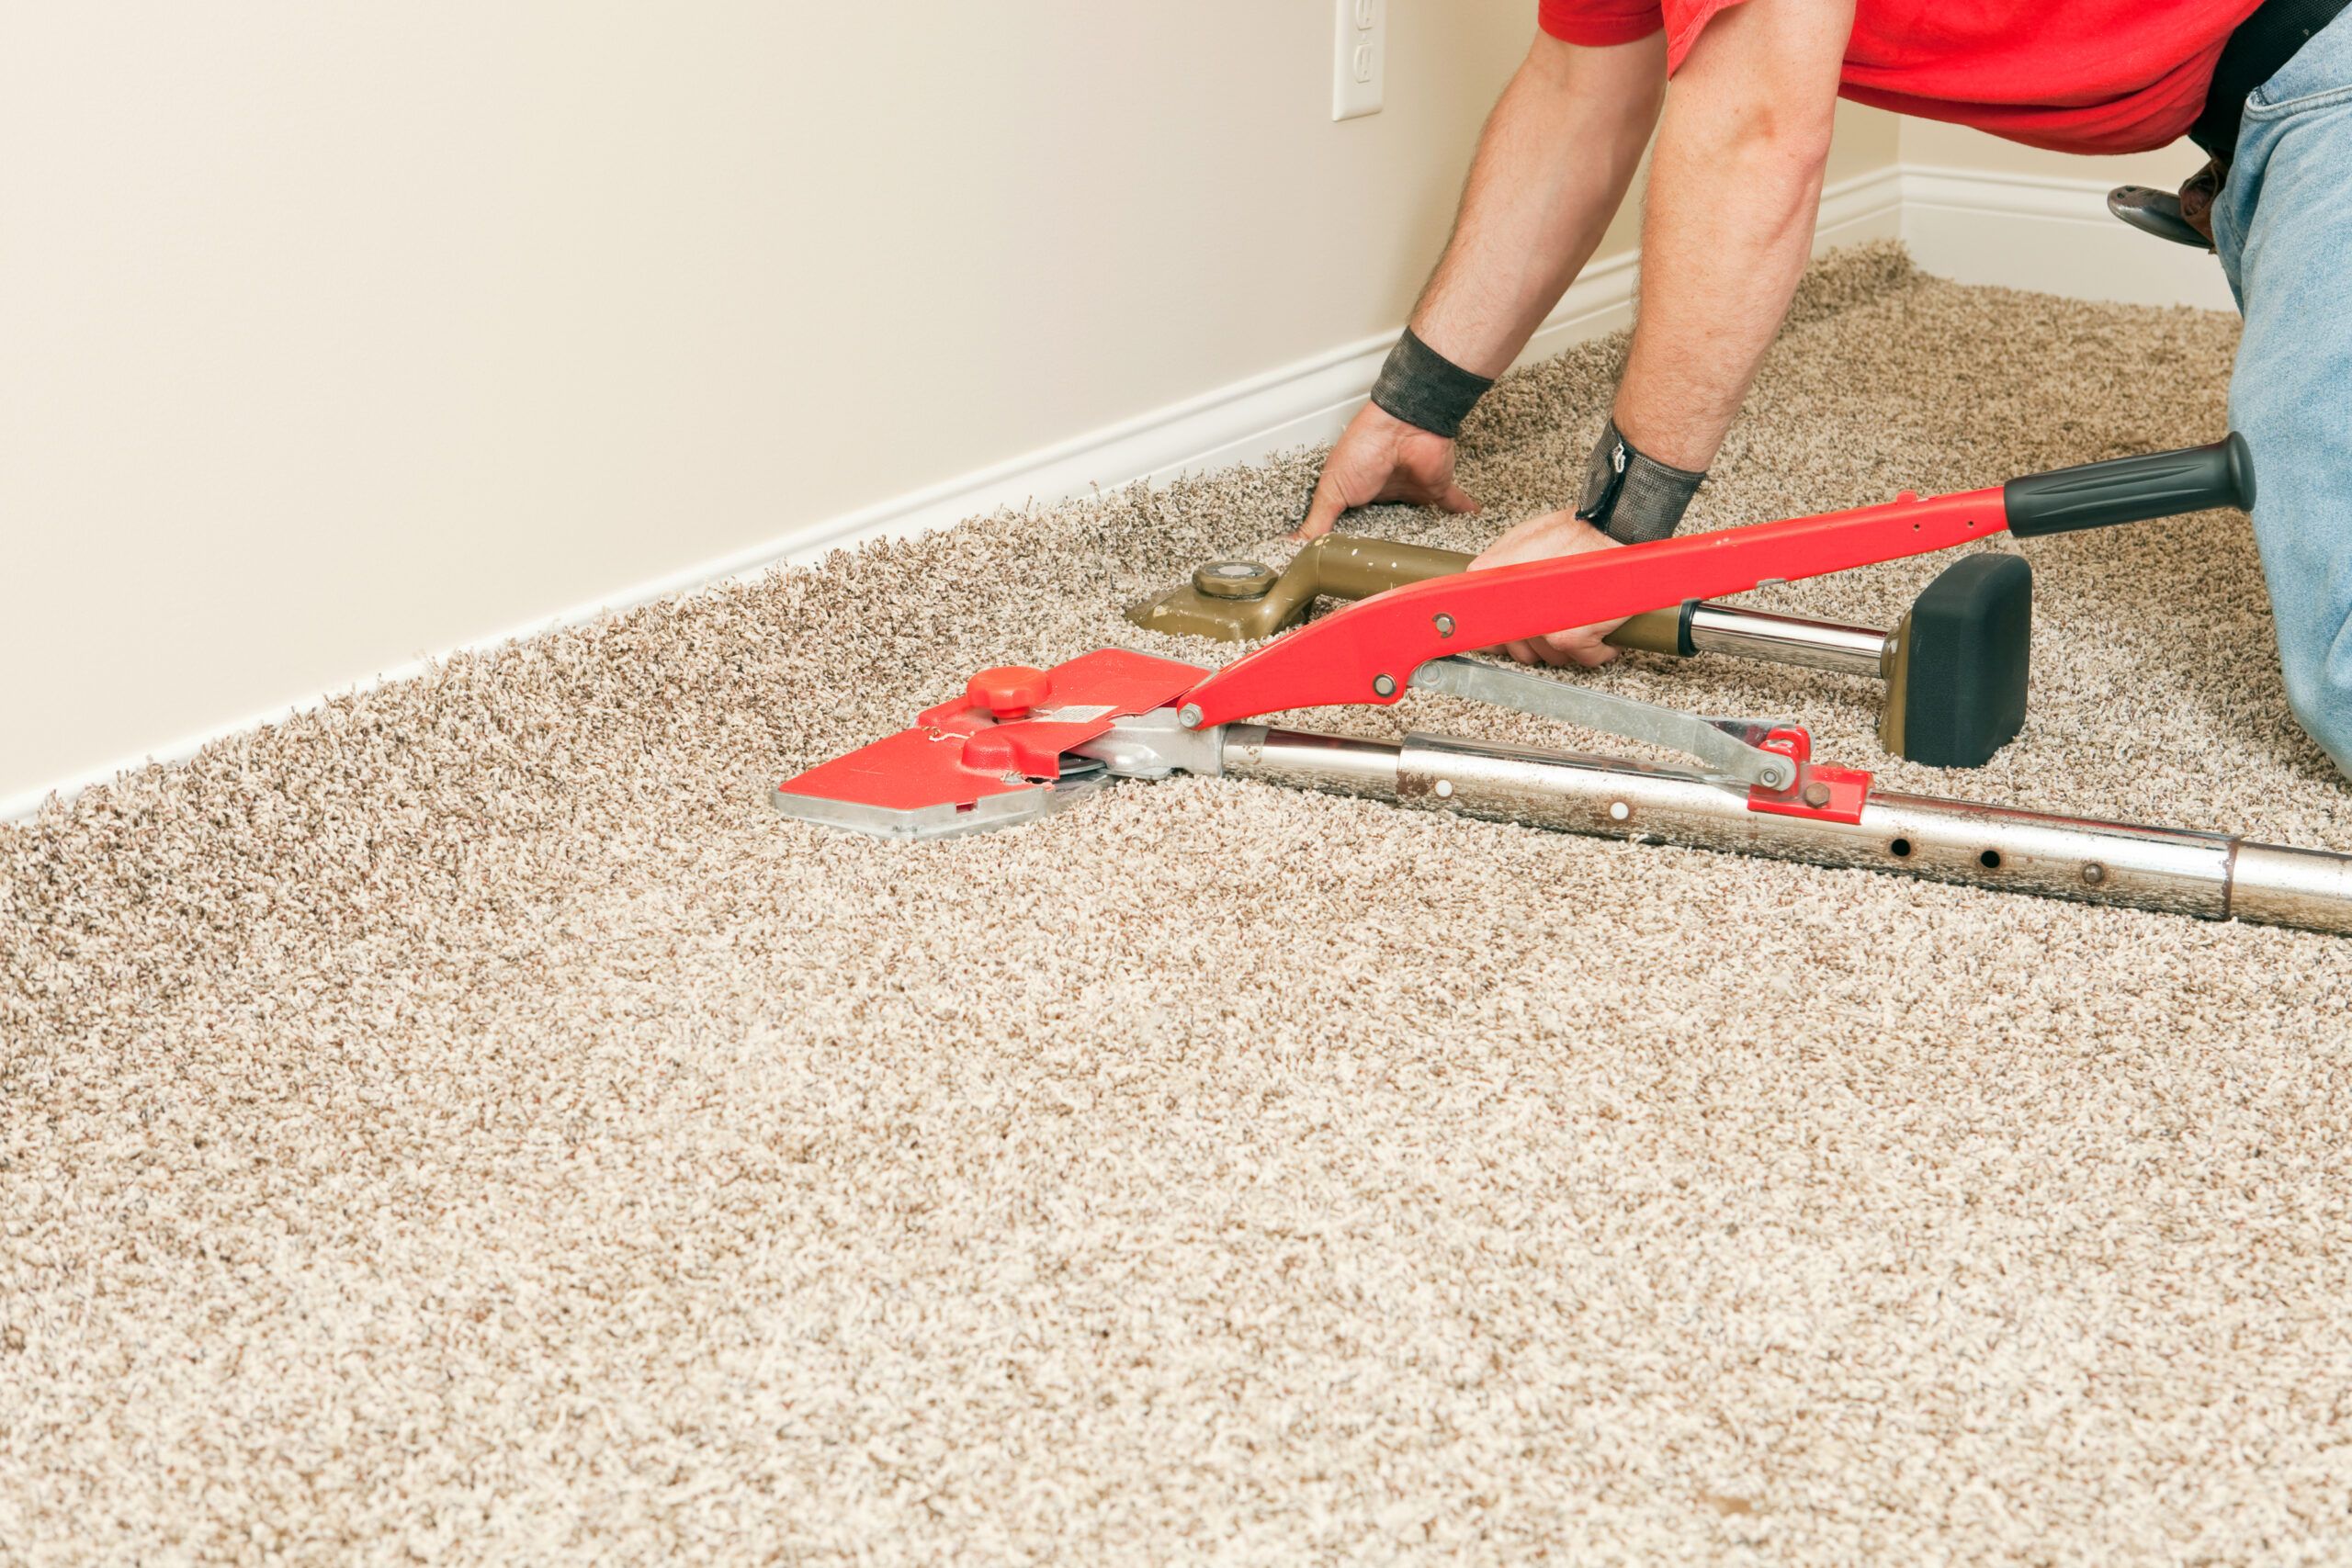
There are two primary methods for stretching carpet: power stretching and knee kicking. Power stretching involves using a power stretcher, while knee kicking utilizes a knee kicker tool. Both methods can be effective, but power stretching is generally recommended for larger areas or more severe wrinkles, while knee kicking is suitable for smaller, localized issues.
To power stretch your carpet, start by attaching the power stretcher to the carpet’s edge using a knee kicker. Extend the stretcher across the room, applying tension to the carpet as you go. Once the carpet is properly stretched, secure it in place using a staple gun along the edges. Repeat this process for each side of the room until the carpet is fully stretched and secure.
If you’re using the knee kicking method, begin by positioning the knee kicker against the carpet’s edge, about six inches from the wall. Apply force with your knee to stretch the carpet, then use a carpet knife to trim any excess material. Repeat this process along each edge of the room, ensuring a tight and secure stretch.
Common Mistakes to Avoid
While stretching carpet DIY style is relatively straightforward, there are a few common mistakes that can hinder your progress. Avoiding these pitfalls will help you achieve better results and save you time and frustration. Here are some mistakes to watch out for:
1. Insufficient stretching: Make sure you stretch the carpet enough to eliminate wrinkles and looseness. Insufficient stretching can lead to the carpet reverting to its previous state over time.
2. Overstretching: While it’s important to stretch the carpet adequately, overstretching can cause damage and create new wrinkles. Be mindful of the tension you apply during the stretching process.
3. Inconsistent stretching: Ensure that you stretch the carpet evenly across the entire room. Failing to do so can result in an uneven appearance and potentially cause the carpet to come loose in certain areas.
4. Incorrect cutting: Take your time when cutting the excess carpet. Using a straight edge and a sharp carpet knife will help you achieve clean and precise cuts, avoiding jagged edges or uneven lengths.
By avoiding these common mistakes and following the proper techniques, you can successfully stretch your carpet DIY style and achieve professional-looking results. Remember to take your time, measure accurately, and make adjustments as needed to ensure a seamless and secure stretch.
Maintaining Stretched Carpet
Once you’ve successfully stretched your carpet, it’s important to maintain its condition to prolong its lifespan and keep it looking its best. Here are a few tips for maintaining stretched carpet:
1. Regular vacuuming: Vacuum your carpet regularly to remove dirt, dust, and debris that can accumulate over time. This helps prevent the buildup of particles that can cause the carpet fibers to wear down.
2. Immediate stain removal: Attend to any spills or stains on your carpet promptly. Blot the affected area with a clean cloth and a mild carpet cleaner to prevent the stain from setting in.
3. Avoid excessive moisture: Excess moisture can lead to mold and mildew growth, which can damage your carpet. Be cautious when cleaning your carpet and avoid saturating it with water or cleaning solutions.
4. Use furniture pads: Place furniture pads under the legs of your furniture to prevent them from denting or damaging the carpet fibers. This helps distribute the weight evenly and reduces the risk of permanent indentations.
By following these maintenance tips, you can keep your stretched carpet in excellent condition and enjoy its benefits for years to come.
Benefits of Stretching Carpet DIY Style
Stretching your carpet yourself offers several benefits beyond just cost savings. Here are some advantages of opting for a DIY approach:
1. Cost-effective: Hiring professionals to stretch your carpet can be expensive. By doing it yourself, you can save money and allocate your budget to other home improvement projects.
2. Flexibility: DIY carpet stretching allows you to work at your own pace and schedule. You can choose the most convenient time to complete the project without relying on external contractors.
3. Skill development: Learning how to stretch carpet DIY style enhances your DIY skills and knowledge. It empowers you to tackle other home improvement projects with confidence and independence.
4. Personal satisfaction: Successfully stretching your carpet and seeing the transformation firsthand can bring a sense of accomplishment and pride. It’s a rewarding experience that adds to the overall satisfaction of DIY projects.
Conclusion
With the proper tools, techniques, and a little patience, stretching carpet DIY style is an achievable task for any homeowner. By following the step-by-step guide provided in this article, you can restore the appearance of your carpet, eliminate wrinkles, and create a safe and comfortable environment in your home. Remember to always prioritize safety and take your time to ensure accurate measurements and precise cuts. With a bit of effort, you’ll be able to enjoy the benefits of a professionally stretched carpet while saving money and gaining valuable DIY skills.
Key Takeaways: How to Stretch Carpet DIY?
2. Start by removing any furniture or obstacles from the room.
3. Use a knee kicker or power stretcher to stretch the carpet towards the opposite wall.
4. Trim any excess carpet and secure it with a carpet trimmer or adhesive.
5. Regularly vacuum and clean the stretched carpet to maintain its appearance.
Frequently Asked Questions
Are you looking for a DIY solution to stretch your carpet? Here are some commonly asked questions about how to stretch carpet DIY:
Q1: Why is it important to stretch carpet?
Stretching carpet is essential to maintain its appearance and longevity. Over time, carpets can become loose and develop wrinkles or ripples. Stretching the carpet helps to eliminate these imperfections, making it safer to walk on and improving its overall aesthetic appeal.
Additionally, stretched carpet provides a smoother surface, preventing tripping hazards and reducing wear and tear. It also helps to preserve the carpet’s padding, as loose carpet can cause the padding to deteriorate faster.
Q2: What tools do I need to stretch carpet DIY?
To stretch carpet DIY, you will need a few essential tools:
– Knee kicker: This tool is used to push the carpet into place and create tension.
– Carpet stretcher: This tool helps to stretch the carpet across the room, ensuring a tight fit.
– Carpet knife: You may need to trim the excess carpet during the stretching process.
– Gloves and knee pads: These will protect your hands and knees while working on the floor.
– Staple gun: If necessary, you may need a staple gun to secure the carpet edges.
Q3: How do I prepare the room before stretching the carpet?
Prior to stretching the carpet, it is important to prepare the room:
– Remove all furniture and objects from the area.
– Vacuum the carpet thoroughly to remove any dirt or debris.
– Check for any loose or damaged tack strips and replace them if necessary.
– If you have baseboards, consider removing them to allow for easier stretching of the carpet.
Q4: What is the process of stretching carpet DIY?
The process of stretching carpet DIY involves the following steps:
1. Start by using a knee kicker to push the carpet towards the walls, creating tension.
2. Use a carpet stretcher to stretch the carpet across the room. Secure one end of the stretcher to the opposite wall and apply pressure to stretch the carpet.
3. Move the stretcher along the wall, repeating the stretching process until the entire carpet is tight and smooth.
4. Trim any excess carpet using a carpet knife.
5. If necessary, secure the edges of the carpet using a staple gun.
Q5: Can I stretch carpet DIY without any prior experience?
Stretching carpet DIY can be challenging without prior experience, but it is possible to do it yourself with proper guidance and tools. It’s important to carefully follow instructions and take your time to ensure a successful outcome.
However, if you’re unsure or uncomfortable with the process, it’s recommended to hire a professional carpet installer who has the expertise and equipment to stretch the carpet effectively.
HOW TO STRETCH CARPET QUICK STEPS
Final Thoughts
After going through the process of DIY carpet stretching, it’s clear that this method can save you both time and money. By following a few simple steps, you can achieve professional-looking results without having to hire a professional. Not only does stretching your carpet improve its appearance, but it also prolongs its lifespan, ensuring that you get the most out of your investment.
Remember to take your time and be patient during the process. It may seem daunting at first, but with a little practice, you’ll become a pro in no time. Don’t forget to gather all the necessary tools and materials before you start, and always prioritize safety by wearing gloves and using knee pads if needed.
In conclusion, learning how to stretch carpet DIY is a valuable skill that can come in handy whenever your carpet starts to show signs of wear and tear. By following the steps outlined in this guide, you’ll be able to bring new life to your carpet and enjoy a fresh and rejuvenated space. So go ahead, grab those tools, and get ready to transform your carpet into a smooth and perfectly stretched floor covering. Your DIY efforts will surely pay off in the long run!