Looking to give your home a fresh new look? Want to say goodbye to that old, worn-out carpet and hello to sleek and stylish vinyl plank flooring? Well, you’ve come to the right place! In this article, we’ll walk you through the step-by-step process of removing carpet and installing vinyl plank flooring. So, grab your tools and get ready to transform your space into something truly stunning!
Now, we all know that removing carpet and installing new flooring can be a daunting task. But fear not, my friend! With our expert guidance and easy-to-follow instructions, you’ll be a pro in no time. Whether you’re a seasoned DIY enthusiast or a complete beginner, we’ve got you covered. So, put on your work gloves, roll up your sleeves, and let’s dive into the exciting world of carpet removal and vinyl plank flooring installation. Get ready to create a space that’s not only beautiful but also durable and easy to maintain. Let’s get started, shall we?
- Start by removing the baseboards and any furniture from the room.
- Use a utility knife to cut the carpet into manageable strips and roll them up for disposal.
- Remove the carpet padding and tack strips, taking care not to damage the subfloor.
- Inspect the subfloor for any damage or unevenness and make necessary repairs.
- Measure the room and purchase enough vinyl plank flooring to cover the area.
- Begin installation by laying down an underlayment, if needed, to provide extra cushioning and soundproofing.
- Start in a corner of the room and lay the first row of vinyl planks, interlocking them tightly.
- Continue installing the planks row by row, using a tapping block and rubber mallet to ensure a secure fit.
- Trim the last row to fit, using a utility knife or a jigsaw.
- Replace the baseboards and enjoy your new vinyl plank flooring!
How to Remove Carpet and Install Vinyl Plank Flooring?
Removing carpet and installing vinyl plank flooring can be a transformative home improvement project. Not only does it give your space a fresh and modern look, but it also provides durability and easy maintenance. Whether you’re a seasoned DIY enthusiast or a beginner, this guide will walk you through the step-by-step process of removing carpet and installing vinyl plank flooring, ensuring a successful and professional result.
Preparation and Tools
Before you begin the project, it’s essential to gather all the necessary tools and materials. You’ll need a utility knife, pliers, pry bar, hammer, vacuum cleaner, measuring tape, chalk line, underlayment, adhesive, vinyl plank flooring, and a roller. Ensure that you have enough flooring to cover the entire area, including any extra for cuts and mistakes.
Start by clearing the room of all furniture and removing the baseboards if necessary. It’s also a good idea to wear protective goggles and gloves to ensure safety during the process. Once you have everything ready, let’s dive into the steps of removing carpet and installing vinyl plank flooring.
Step 1: Removing the Carpet
The first step is to remove the existing carpet from the room. Start by cutting the carpet into manageable sections using a utility knife. Roll up each section and remove it from the room. Once the carpet is gone, you’ll need to remove the carpet padding and tack strips.
Use pliers to pull out any staples or nails securing the padding to the floor. Next, locate the tack strips along the perimeter of the room and carefully pry them up using a pry bar and hammer. Be cautious not to damage the subfloor while removing the tack strips.
Pro tip:
To protect your hands and knees while removing the carpet, consider wearing knee pads and using a carpet removal tool with a sturdy handle.
Step 2: Preparing the Subfloor
After removing the carpet and padding, it’s time to prepare the subfloor for the vinyl plank installation. First, thoroughly clean the subfloor, ensuring it’s free of any debris, dust, or adhesive residue. Use a vacuum cleaner or broom to remove loose particles.
If there are any imperfections or uneven areas on the subfloor, you may need to level or smooth them out. Fill in any holes or gaps with a suitable floor patching compound and sand the surface to create a smooth and even base for the vinyl plank flooring.
Pro tip:
Check the manufacturer’s instructions for specific recommendations on subfloor preparation and leveling products suitable for vinyl plank flooring.
Step 3: Installing the Underlayment
The next step is to install the underlayment, which provides additional cushioning, soundproofing, and moisture protection for your vinyl plank flooring. Measure the dimensions of the room and cut the underlayment accordingly, leaving a small gap around the edges to allow for expansion.
Secure the underlayment to the subfloor using adhesive or staples, following the manufacturer’s instructions. Make sure to overlap the seams and tape them to create a smooth and continuous surface.
Step 4: Installing Vinyl Plank Flooring
Now it’s time to install the vinyl plank flooring. Start by determining the layout and direction of the planks. Consider the room’s shape and size, as well as the flow of natural light. It’s generally recommended to install the planks parallel to the longest wall.
Begin in one corner of the room, laying the first plank with the tongue side facing the wall. Use a spacer to maintain an even gap between the planks and the wall, allowing for expansion. Continue installing the planks, interlocking them together using the click-lock or adhesive method, depending on the type of vinyl plank flooring you’ve chosen.
Pro tip:
When cutting the planks to fit around corners or obstacles, use a utility knife or a vinyl plank cutter for precise and clean cuts. Measure twice before cutting to minimize mistakes.
Maintaining Your Vinyl Plank Flooring
Once you’ve completed the installation, it’s important to know how to properly maintain your vinyl plank flooring. Regularly sweep or vacuum the floor to remove dirt and debris, and wipe up any spills or stains promptly. Avoid using harsh chemicals or abrasive cleaners that can damage the flooring’s surface.
To prevent scratches, place felt pads under furniture legs and use mats or rugs in high-traffic areas. Additionally, avoid dragging heavy furniture across the floor to prevent dents or indentations. With proper care and maintenance, your vinyl plank flooring will continue to look beautiful for years to come.
Benefits of Vinyl Plank Flooring
Vinyl plank flooring offers numerous benefits that make it an attractive choice for homeowners. Some of the key advantages include:
1. Durability: Vinyl plank flooring is highly resistant to scratches, stains, and wear, making it ideal for high-traffic areas and households with pets or children.
2. Easy Maintenance: Unlike carpet, vinyl plank flooring is easy to clean and maintain. Regular sweeping or vacuuming, along with occasional mopping, is usually sufficient to keep it looking pristine.
3. Water Resistance: Vinyl plank flooring is water-resistant, making it suitable for kitchens, bathrooms, and basements. It can withstand spills and moisture without warping or damage.
4. Versatility: With a wide range of colors, patterns, and styles available, vinyl plank flooring offers versatility to match any design aesthetic or personal preference.
5. Cost-Effective: Vinyl plank flooring is typically more affordable than hardwood or tile flooring, making it a budget-friendly option for homeowners.
Conclusion
Removing carpet and installing vinyl plank flooring is a rewarding endeavor that can transform the look and feel of your space. By following the step-by-step process outlined in this guide, you’ll be able to achieve a professional and stylish result. Remember to prepare the subfloor properly, install the underlayment, and take your time with the vinyl plank installation. With proper care and maintenance, your new vinyl plank flooring will provide beauty and durability for years to come. So roll up your sleeves and get ready to enjoy a brand-new floor in your home.
Key Takeaways: How to Remove Carpet and Install Vinyl Plank Flooring?
- Removing carpet before installing vinyl plank flooring is necessary for a clean and smooth installation.
- Start by removing all furniture from the room and then carefully cut and roll up the carpet.
- Once the carpet is removed, inspect the subfloor for any damage or unevenness that needs to be addressed.
- Install an underlayment or moisture barrier on the subfloor to protect the vinyl plank flooring.
- Finally, lay down the vinyl plank flooring, starting from one corner of the room and working your way across.
Frequently Asked Questions
What tools do I need to remove carpet and install vinyl plank flooring?
To successfully remove carpet and install vinyl plank flooring, you will need a few essential tools. These include a utility knife, pliers, a pry bar, a hammer, a tape measure, a straight edge, a power drill, a jigsaw, a rubber mallet, and a tapping block. Having these tools on hand will make the process much smoother and more efficient.
Additionally, you may also need a floor scraper to remove any adhesive residue left behind after removing the carpet. It is important to have the right tools before starting the project to ensure that you can complete it effectively and without any unnecessary delays.
Can I install vinyl plank flooring over carpet padding?
No, it is not recommended to install vinyl plank flooring directly over carpet padding. Carpet padding is not a suitable subfloor for vinyl plank flooring installation. The padding is too soft and can cause the vinyl planks to become unstable and eventually lead to problems such as buckling and shifting.
Before installing vinyl plank flooring, it is essential to remove the carpet padding and ensure that the subfloor is clean, dry, and level. This will provide a solid and stable foundation for the vinyl planks and ensure a successful installation.
Do I need to remove baseboards before installing vinyl plank flooring?
It is not necessary to remove baseboards before installing vinyl plank flooring, but it is generally recommended. Removing the baseboards allows for a cleaner and more professional-looking installation, as the vinyl planks can be installed neatly against the wall without any obstructions.
If you choose not to remove the baseboards, you can install quarter round molding or shoe molding along the perimeter of the room after the vinyl plank flooring is installed. This will cover any gaps between the flooring and the baseboards, providing a finished appearance.
Do I need to acclimate vinyl plank flooring before installation?
Yes, it is important to acclimate vinyl plank flooring before installation. Acclimation allows the flooring to adjust to the temperature and humidity of the room, reducing the risk of expansion or contraction after installation.
To acclimate the vinyl plank flooring, remove the planks from their packaging and stack them in the room where they will be installed. Leave them there for at least 48 hours, ensuring that the room temperature and humidity are consistent with the conditions the flooring will be exposed to on a regular basis. This will help the planks adjust and minimize the chances of any issues arising later on.
Can vinyl plank flooring be installed in a bathroom?
Yes, vinyl plank flooring can be installed in a bathroom. In fact, it is a popular choice for bathrooms due to its durability and water resistance. However, it is important to choose a vinyl plank flooring that is specifically designed for wet areas.
Look for vinyl planks that have a waterproof or water-resistant core and a protective wear layer. These features will help prevent water damage and ensure that the flooring can withstand the moisture and humidity commonly found in bathrooms. Proper installation techniques, such as using adhesive or click-lock systems, should also be followed to ensure a watertight seal.
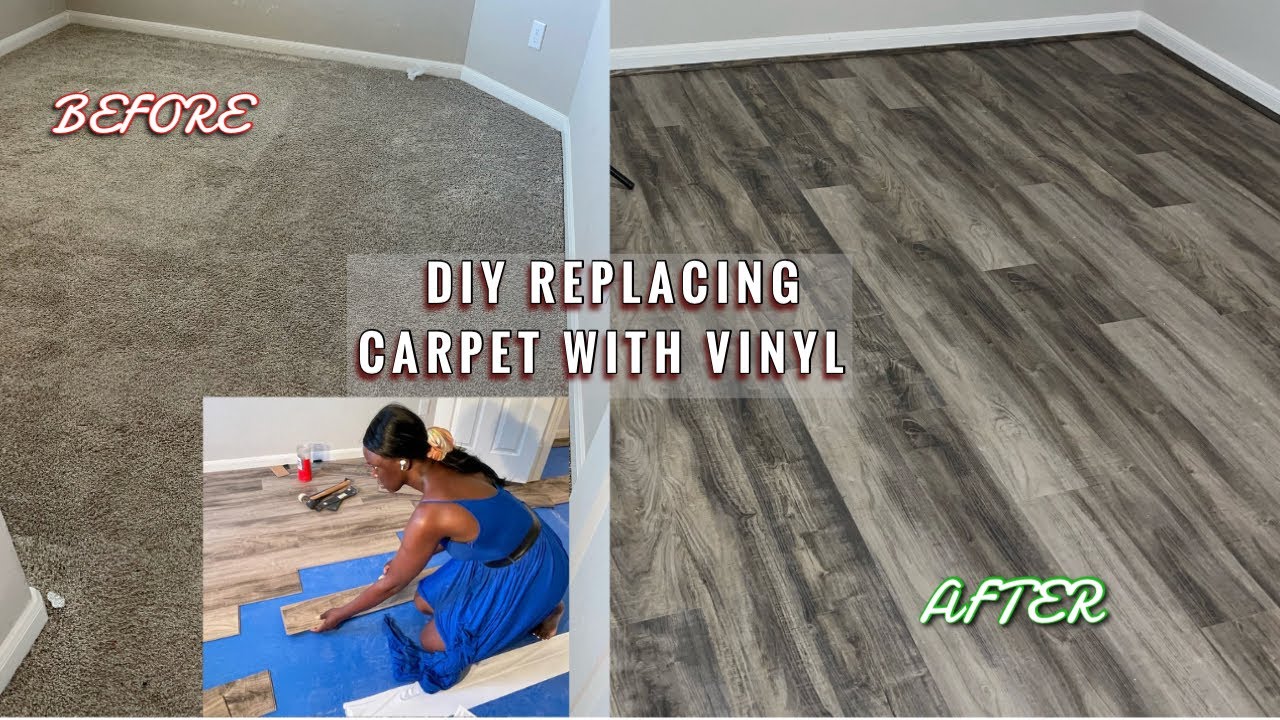
Replacing carpet with luxury vinyl tile (planks)
Final Thoughts on Removing Carpet and Installing Vinyl Plank Flooring
And there you have it, the complete guide on how to remove carpet and install vinyl plank flooring! We’ve covered everything from gathering the necessary tools to preparing the subfloor and finally laying down the beautiful vinyl planks. Now, you can enjoy the benefits of a durable, low-maintenance flooring option that adds a touch of elegance to your space.
Throughout this process, it’s important to remember that patience and attention to detail are key. Take your time and follow each step carefully to ensure a smooth and successful installation. And don’t hesitate to seek help or advice if needed. After all, it’s better to ask for assistance than to end up with a botched flooring job.
By following the tips and techniques outlined in this guide, you’ll be well on your way to transforming your space and enjoying the many advantages of vinyl plank flooring. So roll up your sleeves, grab your tools, and get ready to make a positive change in your home. Good luck and happy flooring!
Remember, the key to a successful flooring project is careful planning, proper preparation, and precise execution. With these elements in place, you’ll be able to achieve a stunning and long-lasting result that will make you proud. So go ahead and take the leap – remove that old carpet, install those vinyl planks, and enjoy the beauty and functionality they bring to your home.