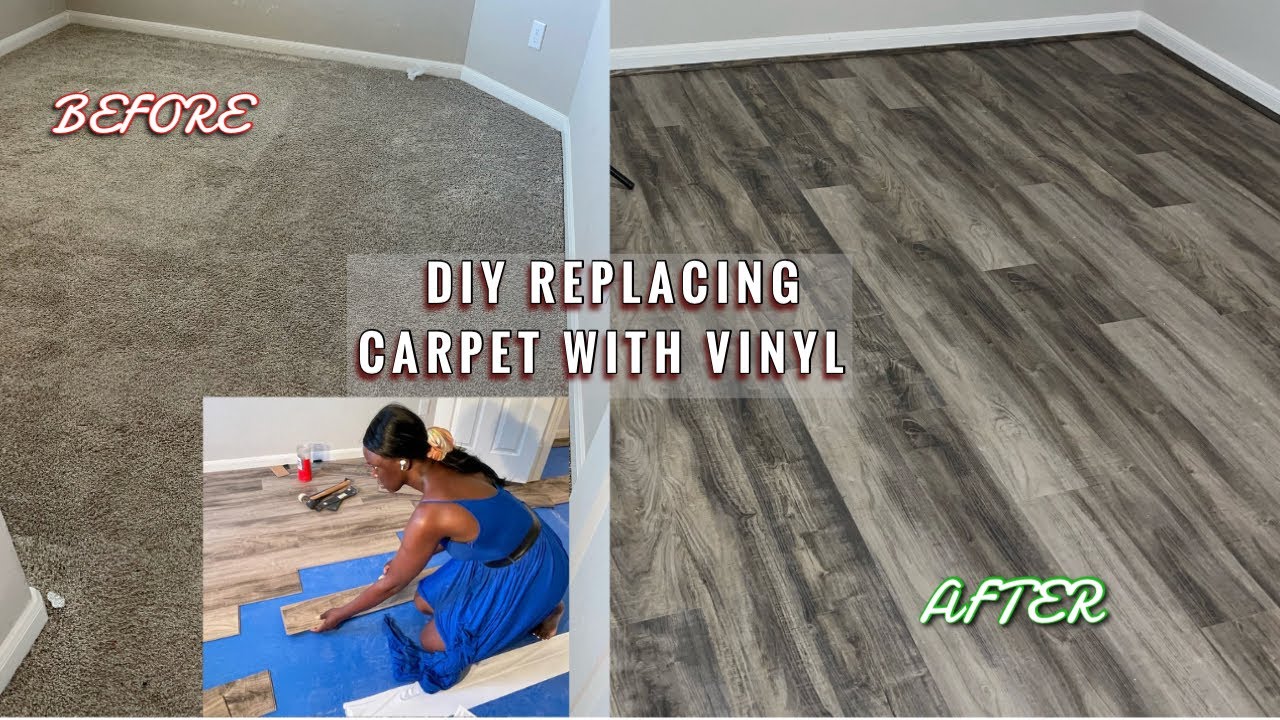
Thinking of giving your home a fresh new look? Want to change your carpet to vinyl flooring? Well, you’ve come to the right place! In this article, we’ll walk you through the process of transforming your floors from cozy carpet to sleek and durable vinyl. So, get ready to say goodbye to those pesky stains and hello to a stylish and low-maintenance flooring option. Let’s dive in!
Changing carpet to vinyl flooring may seem like a daunting task, but fear not! We’re here to guide you every step of the way. Whether you’re looking to update a single room or your entire home, we’ve got you covered. From prepping the subfloor to installing the vinyl planks, we’ll provide you with all the information you need to successfully complete the transformation. So, grab your tools and let’s get started on this exciting home improvement project!
If you’re looking to switch from carpet to vinyl flooring, follow these easy steps:
- Remove the carpet: Start by removing the old carpet, including the padding, tack strips, and any adhesive.
- Prepare the subfloor: Ensure the subfloor is clean, level, and free of any debris or nails.
- Install underlayment: Lay down a suitable underlayment to provide a smooth surface for the vinyl flooring.
- Measure and cut: Measure the room carefully and cut the vinyl flooring to fit, leaving some extra around the edges.
- Lay the vinyl flooring: Starting from one corner, lay the vinyl flooring, pressing it down firmly and smoothing out any wrinkles or bubbles.
- Trim and finish: Trim off the excess vinyl flooring and install baseboards or molding to give your new floor a polished look.
By following these steps, you can easily transform your carpeted space into a stylish vinyl floor.
How to Change Carpet to Vinyl Flooring?
Changing carpet to vinyl flooring is a popular home improvement project that can give your space a fresh and modern look. Whether you’re tired of dealing with stains and odors or simply want to update the style of your floors, switching from carpet to vinyl can be a great solution. In this article, we will guide you through the process of changing carpet to vinyl flooring, step by step. From removing the old carpet to installing the new vinyl, we’ll cover everything you need to know to ensure a successful and professional-looking result.
Step 1: Prepare Your Space
Before you begin the process of changing your carpet to vinyl flooring, it’s important to properly prepare your space. Start by removing all furniture and other items from the room. This will give you a clear and open area to work in. Next, carefully remove the baseboards and any other trim that may be covering the edges of the carpet. This will allow for a clean and seamless installation of the new vinyl flooring.
Once the room is clear and the trim is removed, thoroughly clean the subfloor. Remove any debris, dust, or dirt that may be present. It’s important to have a clean and smooth surface to ensure proper adhesion of the vinyl flooring. If there are any uneven areas or damage to the subfloor, now is the time to address and repair them. Fill in any holes or cracks and level any uneven spots to create a solid foundation for your new flooring.
Step 1.1: Removing the Old Carpet
To remove the old carpet, start by cutting it into manageable sections using a utility knife. Roll up each section and remove it from the room. Be careful when handling the carpet, as it can be heavy and bulky. Once the carpet is removed, you may also need to remove the carpet padding if it is attached to the subfloor. Use a pry bar or pliers to carefully detach the padding, taking care not to damage the subfloor in the process.
After the carpet and padding are removed, thoroughly clean the subfloor to remove any remaining adhesive or debris. Use a scraper or floor adhesive remover to ensure a clean and smooth surface. Once the subfloor is clean, vacuum or sweep the area to remove any dust or loose particles. This will ensure a clean and even installation of the new vinyl flooring.
Step 2: Choose Your Vinyl Flooring
Once your space is prepared and the old carpet is removed, it’s time to choose the right vinyl flooring for your project. Vinyl flooring comes in a variety of styles, colors, and patterns, allowing you to find the perfect fit for your space. Consider the overall aesthetic of your room, as well as your personal preferences and lifestyle. Whether you prefer the look of hardwood, stone, or tile, there is a vinyl flooring option to suit your taste.
When selecting vinyl flooring, consider the durability and maintenance requirements of each option. Look for vinyl that is designed to withstand heavy foot traffic, moisture, and stains. This is especially important in areas such as kitchens, bathrooms, and entryways. Additionally, consider the installation method of the vinyl flooring. Some options feature a peel-and-stick adhesive backing, while others require traditional glue or a click-lock system. Choose the installation method that best suits your skill level and preferences.
Step 2.1: Measure and Purchase the Vinyl Flooring
Before purchasing the vinyl flooring, accurately measure your space to determine how much flooring you will need. Measure the length and width of the room, taking into account any alcoves or irregularities. Add a few extra inches to each measurement to account for any mistakes or cuts. Once you have your measurements, consult the product packaging or speak with a flooring specialist to determine the amount of flooring you will need to purchase.
When purchasing the vinyl flooring, consider buying a little extra to account for any future repairs or replacements. It’s always better to have a few extra pieces on hand than to run out and be unable to find a perfect match later on. Additionally, consider purchasing any necessary tools or supplies for the installation, such as adhesive, transition strips, or floor rollers. Being prepared with everything you need will make the installation process smoother and more efficient.
Step 3: Install the Vinyl Flooring
Now that you have prepared your space and chosen your vinyl flooring, it’s time to install it. Start by carefully following the manufacturer’s instructions for your specific vinyl flooring product. Each product may have slightly different installation requirements, so it’s important to read and understand the instructions before you begin.
In general, the installation process will involve applying adhesive, laying the vinyl flooring, and then securing it in place. Use a trowel or roller to evenly spread the adhesive onto the subfloor. Then, carefully lay the vinyl flooring into place, starting in one corner of the room. Press down firmly to ensure proper adhesion. Use a floor roller to further secure the vinyl and remove any air bubbles or wrinkles.
Continue installing the vinyl flooring row by row, working your way across the room. Trim the vinyl as needed to fit around doorways, corners, or other obstacles. Remember to leave a small gap around the edges of the room to allow for expansion and contraction of the vinyl flooring. Once the flooring is fully installed, replace the baseboards and any other trim that was removed.
Step 3.1: Finishing Touches
After the vinyl flooring is installed, take the time to carefully inspect the entire space. Look for any imperfections or areas that may need touch-ups. Use a seam sealer to seal any seams or joints in the vinyl flooring, ensuring a seamless and professional finish. Additionally, consider adding transition strips or thresholds where the vinyl flooring meets other types of flooring, such as tile or hardwood. These finishing touches will add a polished and cohesive look to your new vinyl floors.
In conclusion, changing carpet to vinyl flooring can be a rewarding and transformative home improvement project. By following these steps and taking the time to properly prepare, choose, and install your vinyl flooring, you can achieve beautiful and durable floors that will enhance the look and functionality of your space. So, say goodbye to your old carpet and hello to stylish and low-maintenance vinyl flooring!
Key Takeaways: How to Change Carpet to Vinyl Flooring?
– Clean the subfloor thoroughly before installing the new vinyl flooring.
– Measure the room accurately to ensure you purchase enough vinyl flooring.
– Use a utility knife to cut the vinyl to fit the room’s dimensions.
– Install the vinyl flooring by following the manufacturer’s instructions carefully.
Frequently Asked Questions
Can I install vinyl flooring directly over carpet?
No, it is not recommended to install vinyl flooring directly over carpet. For a successful and long-lasting installation, it is important to remove the carpet before installing vinyl flooring. Carpet can provide an uneven surface and may cause the vinyl flooring to not adhere properly. Additionally, carpet padding can trap moisture, which can lead to mold and mildew issues. It is best to remove the carpet and prepare the subfloor before installing vinyl flooring.
To remove the carpet, start by cutting it into manageable sections with a utility knife. Then, roll up each section and remove it from the room. Next, remove any carpet padding that may be underneath. Once the carpet and padding are removed, thoroughly clean the subfloor to ensure it is free of debris and adhesive residue. Finally, follow the manufacturer’s instructions for installing the vinyl flooring, which may include applying an adhesive or using a floating installation method.
What tools do I need to change carpet to vinyl flooring?
Changing carpet to vinyl flooring requires a few basic tools. Here are some tools you may need:
1. Utility knife: This will be useful for cutting and removing the carpet.
2. Pry bar: A pry bar can help you remove any carpet tack strips or baseboards.
3. Hammer: You may need a hammer to remove any nails or staples that are holding the carpet in place.
4. Floor scraper: A floor scraper can help you remove any adhesive residue from the subfloor.
5. Measuring tape: Accurate measurements are important when cutting the vinyl flooring to fit the room.
6. Straight edge: A straight edge can be used as a guide when cutting the vinyl flooring.
7. Notched trowel: If you are using an adhesive, a notched trowel will help you apply it evenly.
Make sure to have these tools on hand before starting the project to ensure a smooth and successful installation.
Do I need to remove the baseboards before installing vinyl flooring?
It is not necessary to remove the baseboards before installing vinyl flooring, but it is often recommended. Removing the baseboards can make the installation process easier and result in a cleaner, more professional-looking finish. By removing the baseboards, you can install the vinyl flooring all the way to the wall, without having to cut around the baseboards. This can help create a seamless and cohesive look.
If you choose to leave the baseboards in place, you will need to cut the vinyl flooring to fit around them. This can be a more time-consuming and challenging process, as it requires precise measurements and cuts. Additionally, leaving the baseboards in place can create small gaps between the flooring and the wall, which may collect dirt and debris over time.
Ultimately, the decision to remove the baseboards or not is up to you. Consider your skill level, time constraints, and desired end result when making this decision.
Can I install vinyl flooring over a concrete subfloor?
Yes, vinyl flooring can be installed over a concrete subfloor. However, it is important to properly prepare the subfloor before installation to ensure a successful and long-lasting result.
Start by thoroughly cleaning the concrete subfloor, removing any dirt, debris, or adhesive residue. Next, check the moisture level of the concrete. Excessive moisture can cause issues with the vinyl flooring, so it is important to address any moisture problems before installation. If necessary, use a moisture barrier or sealer to protect the vinyl flooring from moisture damage.
Once the subfloor is clean and dry, you can proceed with the installation. Follow the manufacturer’s instructions for adhesive or floating installation methods, ensuring that the vinyl flooring is properly secured to the concrete subfloor. It is also important to leave a small gap around the edges of the room to allow for expansion and contraction of the vinyl flooring.
How do I clean and maintain vinyl flooring?
Cleaning and maintaining vinyl flooring is relatively easy. Regular maintenance can help keep your vinyl flooring looking its best for years to come.
To clean vinyl flooring, start by sweeping or vacuuming to remove any loose dirt or debris. Next, damp mop the floor using a mixture of mild detergent and warm water. Avoid using harsh cleaners or abrasive tools, as these can damage the vinyl. For stubborn stains, you can use a non-abrasive cleaner specifically designed for vinyl flooring. Always follow the manufacturer’s recommendations for cleaning products.
It is also important to protect your vinyl flooring from scratches and dents. Place felt pads on the bottom of furniture legs to prevent scratching, and use caution when moving heavy objects across the floor. Avoid wearing high heels or shoes with sharp edges that can damage the vinyl. Additionally, placing doormats at entryways can help prevent dirt and debris from being tracked onto the floor.
DIY: HOW TO CHANGE CARPET AND INSTALL VINYL FLOORING. PISO DE VINILO
Final Summary: Transforming Your Floors from Carpet to Vinyl
So there you have it, folks! We’ve explored the exciting journey of changing your carpet to vinyl flooring. It’s been quite a ride, hasn’t it? From the initial considerations to the meticulous installation process, we’ve covered it all. And now, it’s time to wrap things up with a final summary.
In conclusion, transitioning from carpet to vinyl flooring offers a multitude of benefits. Not only does it provide a fresh and modern look to your space, but it also enhances durability and ease of maintenance. With its wide range of styles and designs, vinyl flooring allows you to unleash your creativity and personalize your home. Whether you prefer the timeless elegance of hardwood or the sleek appearance of stone, vinyl flooring has got you covered.
So, if you’re ready to bid farewell to your old carpet and embark on an exciting flooring transformation, don’t hesitate to dive into the world of vinyl. Remember to carefully prepare your subfloor, choose the right type of vinyl for your needs, and follow the installation steps diligently. With a little patience and effort, you’ll soon be reveling in the beauty and functionality of your brand new vinyl floors. Get ready to step into a world of endless possibilities!